Hexie Handbag Kit - Part Three
Firstly my Quilting Friends, even if your not making this kit, it's worth scrolling to the bottom of the page to see the music video I've selected for you today.....I know I'm just a tad older than these boys usual fans but I love their music anyway.
Phew - nearly there now....final push...
Hexie Handbag kit - part 3 - no cliff hanger today my Quilty Friends.
Today we finish this kit!
OK you should be all refreshed now and have a piece of work that looks something like this.


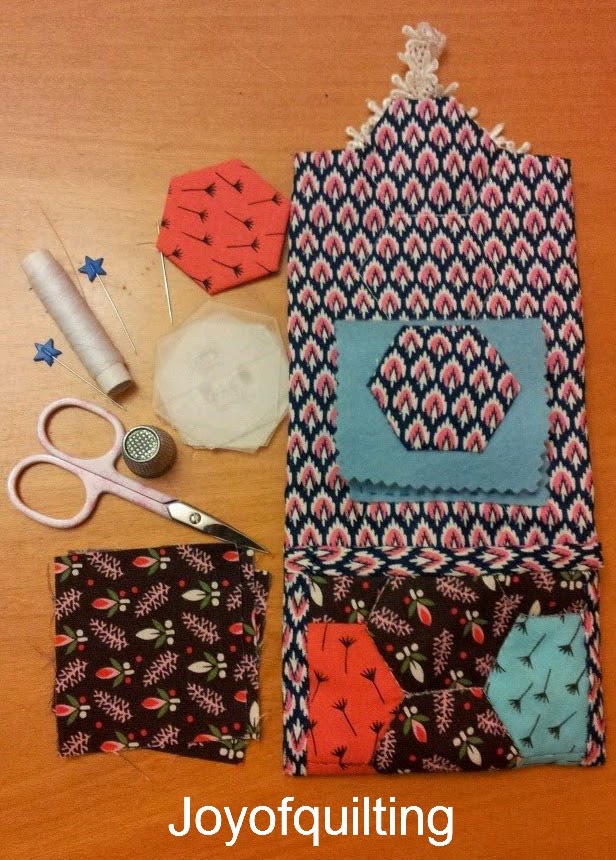


Front view folded over once
Phew - nearly there now....final push...
Hexie Handbag kit - part 3 - no cliff hanger today my Quilty Friends.
Today we finish this kit!
OK you should be all refreshed now and have a piece of work that looks something like this.
Yes?
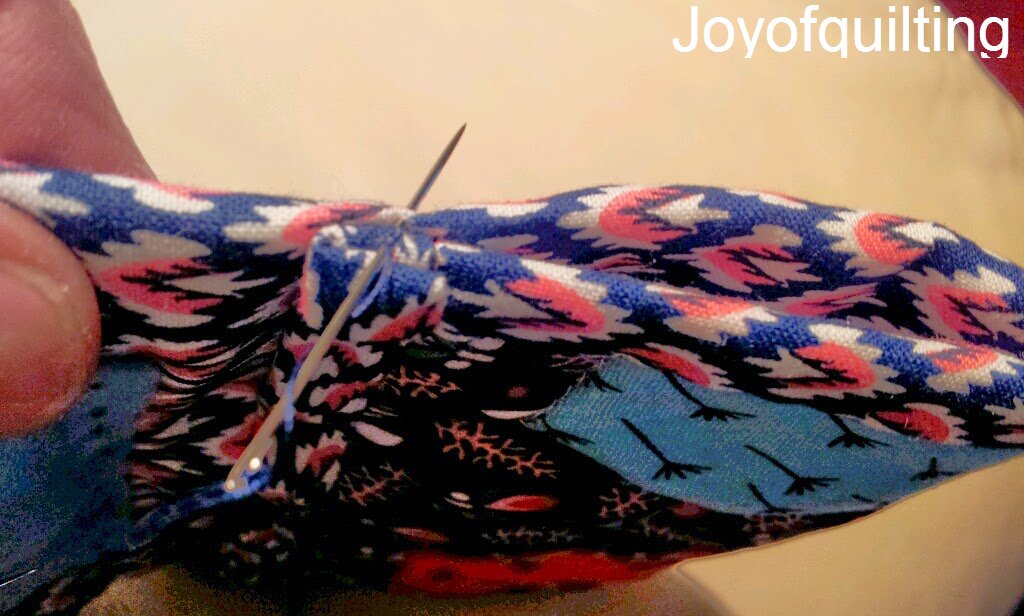
Right next step you need to trim the backing fabric to a generous half inch (1.5c.m.) all around.
Then using the tip of an iron (a travel iron is great for this) press
over towards you work - see pic above
And pin/tack it over onto the front of your work to create a binding around the edge.
Stitch binding in place using a co-ordinating thread.
Note - when stitching the binding around the protruding hexagon flap see pic below.
You will need to cut slightly into the corners for the binding to sit flat.
Can you see the two little cuts - one either side of the flap hexagon below?
Don't worry - I covered mine with the lace. You could use
ribbon or buttons - but we'll get to that a little later.
When finished the kit will fold over itself twice (so more of a roll than a purse).
The next step is to fold the front of the kit up to half way
to make the pocket (see pic below)
And stitch in place on either side
To make the pin/needle flap.
Cut a piece of felt (mine was 3"(8c.m).x5"(13c.m.)
Fold in half and stitch bottom half only onto your kit
(see pic below for placement) using a running stitch
and just going into the backing fabric.
The top half of the felt then creates a cover for your 'needle case'
'Optional'
Just before you complete your stitching around the bottom half of the felt
push a small amount of stuffing in between the felt and the lining.
It should look like the pic below when finished.
Applique hexagon no. 22 onto the front of the felt needle cover for decoration.
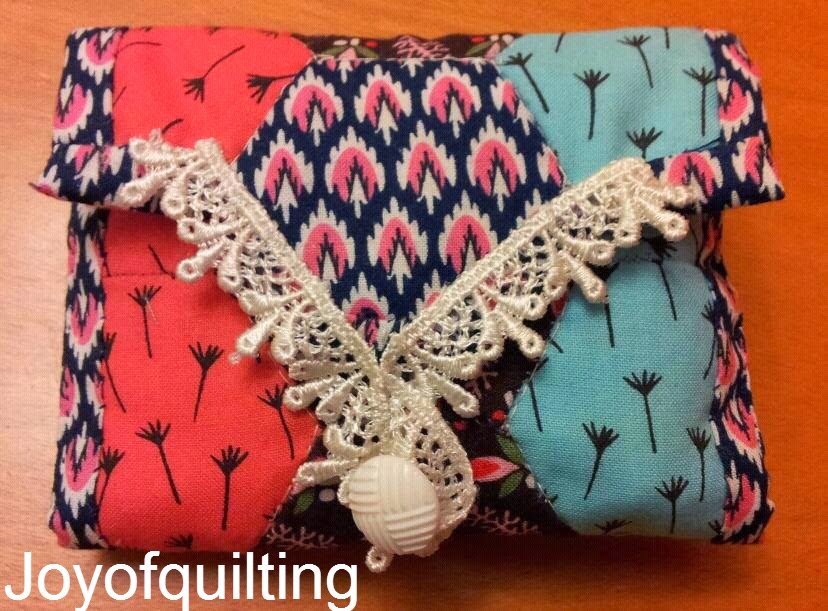
AND FINALLY
To finish I attached a button and stitched some lace in a V leaving a little overhang as a button hole
And there you have it my Hexie Handbag Kit.
With room inside to store:
Your, needles, pins, thread, thimble, hexagon templates, needle threader, scissors, and fabrics.
And
At 4"x 4 1/2" (10cmX12cm) How cute is that!
Sew
You will always be prepared to stitch a quick hexagon!
Some additional pictures to help you
Back view of finished kit. Front view - note pin used to
keep needle/pin case closed.
Front view folded over once
So there you have it.
And I have to say it took me far longer to take and post all the pictures
and write up the instructions than it did to make the actual Kit!
For now, Yours in Stitches, Joy
p.s. I feel like I need a little relaxation now, so I'm going to take Daisy out for a stroll.
You might like to relax with a well earned Tea or Coffee while checking out My Other Social Media Links


Comments